Ever wonder what a VGT is? It stands for Variable Geometry Turbocharger. It might also be called a VNT, which means Variable Nozzle Turbocharger.
There are excellent explanations of VGT designs on the Internet, but our interest here is more upon their maintenance.
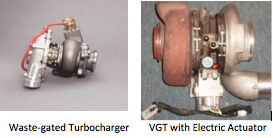
First, why are VGTs needed on diesel engines?
The answer is that the former waste-gated designs are too slow for today’s fuel injection systems.
Current common rail fuel injection systems fire as many as five times in one combustion cycle. In order to maintain proper air/fuel ratios, the turbo boost has to be adjusted more rapidly than a pneumatically controlled system can keep up with.
Secondly, the VGT acts as the “traffic cop” which balances air intake pressure with exhaust backpressure required for EGR induction and is constantly “hunting” to maintain the balance.
So what do we need to know about VGTs? Here are some facts about them.
- Boost will fluctuate, depending upon vehicle speed, load and desired EGR flow. Boost is almost instantaneously altered with throttle position changes. Even at steady throttle and constant load the boost might vary with EGR demand.
- Boost can vary day-to-day. Ambient air pressure and temperature are sensed by the ECM so that boost pressures are always optimized for engine operating requirements.
- VGTs will whistle loudly in certain normal engine operating conditions. This condition occurs when the ECM requests more exhaust heat for regeneration of the diesel particulate filter. The whistle might sound like a boost leak but is actually a normal condition.
- VGT sizing must be matched to the engine to prevent over-boost conditions.
- The replacement of a VGT requires reprogramming of the actuator.
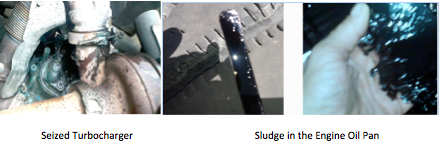
In order to protect a VGT from seizing, it is essential that we maintain engine oil cleanliness.
The VGT turns at speeds exceeding 100,000 rpm, so bearing failure is catastrophic. The engine oil both lubricates and cools the bearings.
We want to avoid conditions like these:

We can avoid VGT failure by employing protection procedures.
- First, we match oil changes to engine hours and drive cycles, NOT to mileage.
- Second, we watch for oil pan sludge accumulation and check oil condition when we change oil. Gritty oil will lead to turbo failure.
- Third, we watch for the engine “making oil”. That is, excessive DPF regeneration attempts due to contaminated turbo output pressure sensors or to improper DPG regeneration functions can dilute the oil with fuel.
We need to record OIL LEVELS upon oil changes to protect against dilution.
If we detect sludge build-up, we need to either clean or replace the oil pan and fix the root causes of sludge creation or fuel intrusion.
Taking the proper precautions to prevent VGT failures can save repair bills of thousands of dollars for replacement and calibration of a VGT.

Diesel engines are becoming more popular, and are being used more & more in automobiles as well as heavy haul trucks. As diesel engines are now being used more often, there are more places where you can fill your diesel engine spare parts needs.
Do you know the difference between a Diesel Engine and a Gas Engine?
All diesel mechanics would be able to tell you the difference, but for those who aren’t, I have some information for you.
Both diesel engines & gas engines are considered “Internal combustion engines”, so they are similar in this regard. It’s how the combustion happens that makes them different.
Diesel Engine: (aka – compression-ignition engine)
Uses heat of compression to initiate the ignition & burning of fuel that has been injected into the combustion chamber.
Spark-Ignition Engine:
Can be referred to as either petrol or gasoline engine. Instead of using compression to initiate an ignition, spark plugs are used to ignite an air-fuel mixture.
Even though the use of diesel engines is on the rise, finding reliable diesel engine spare parts can be tricky. Not all parts shops carry diesel engine spare parts, and the ones that do usually carry just the more popular brands or parts found in their local area. The best thing to do is find a parts shop that specializes in diesel parts if possible.
Do you know some of the pros/cons of diesel engines vs gas engines?
PRO: Diesel engines get great mileage and can deliver anywhere from 20%-30% better fuel economy.
This all depends on the setup of the engine and if it’s an automobile or long haul truck.
CON: As the use of diesel engines increases, the price of diesel fuel will continue to increase. Diesel fuel is used not just for engines, but home & industrial generators & heating oil.
PRO: Diesel fuel is one of the most efficient & energy dense fuels available because it contains more usable energy then gasoline.
CON: The extra energy doesn’t result in extra high-speed performance. Diesel engines are more considered work horses, while gasoline engines are considered racehorses. As technology advances, so does the efficiency and output of diesel engine spare parts. Some automobiles with diesel engines can compare to certain high powered gasoline equivalents.
PRO: Diesel shave no spark plugs or distributors, so they do not require ignition tune-ups.
CON: Regular maintenance is still required to keep diesel engines running. There are multiple filters that regularly need to be changed.
Due to how diesel fuel burns, diesel engines provide more torque to the driveshaft than gasoline engines.This allows diesel powered trucks, SUVs and cars to “out tow” gas-powered vehicles while still providing that improved fuel economy.
It’s no wonder that the majority of heavy haul trucks use diesel engines instead of gasoline-powered engines.
The use of diesel engines are not limited to automobiles, trucks or generators. Many of today’s construction machines, buses and farm/agricultural machines utilize diesel engines.
As the use of diesel engines increases and technology improves, the need for diesel engine spare parts will increase and improve with them.

When it comes to vehicle maintenance, many people may tend to overlook the cooling system.
After all, if the vehicle is not showing signs of overheating or you do not notice any leakage on the ground under the engine,
most would assume there is nothing to worry about.
Performing maintenance on the cooling system is more important than you think.
And is more than just adding new coolant and replacing a water pump when needed.
The maintenance process is relatively simple and consists of performing tasks that even people with no mechanical experience can do.
Here are steps for performing Cooling System Maintenance on your vehicle:
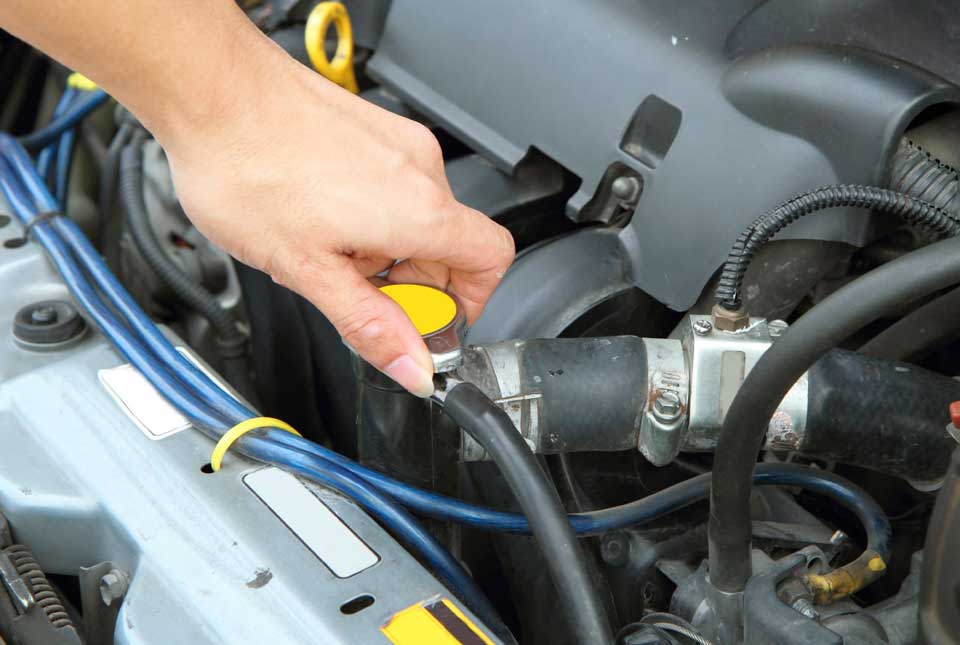
- Check coolant/antifreeze levels periodically and add coolant/antifreeze when needed.
- Look for any signs of leaking under the car, from the water pump, the hoses or the radiator.
- Check all the hoses connected to water pump and radiator.
- Pressure Test the radiator cap to ensure it is holding the proper pressure and not leaking.
- Check the thermostat – once the coolant reaches a certain temperature, the thermostat opens up allowing coolant to flow, regulating the coolant temperature. If the thermostat is stuck and will not open, it causes poor circulation and can lead to the engine overheating.
- Confirm the engine cooling fan is operating correctly.
- When replacing the water pump, flush the entire cooling system. Draining and replacing coolant is not enough. Flushing the cooling system removes any build-up of sediment or rust, which could prematurely damage the new water pump.
The most important thing is to remember to perform these tasks on a semi-regular basis,
which will help lead to longer engine life.
If you feel that you cannot do these tasks yourself or suspect that something may be wrong,
then take your vehicle to a trusted mechanic for further inspection.
Your vehicles cooling system is vital to engine performance and longevity.
If there is something wrong, the engine can overheat causing major damage like a cracked cylinder head or warped cylinders
– both of which are expensive repairs.
Make sure that you regularly check your cooling system to ensure long life for the engine in your vehicle.

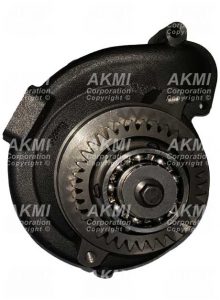
Water Pumps are one of many engine parts that will need to be replaced several times over the course of a vehicle’s life. Most water pumps will last an average of 60,000 to 90,000 miles, some lasting as long as 100,000 miles or more. This is dependent on engine maintenance and how hard the engine is pushed. It doesn’t matter if the vehicle is a small compact automobile or a heavy-duty semi-truck.
Let’s say it is now time for you to replace your water pump and you want to do it yourself. How much do you know about installing a new water pump?
Here are some basics that most people would know:
- Let the engine cool down before you get started.
- Drain all coolant from the engine.
- Remove the old water pump and clean the gasket surface of the old material or sealant.
- Install a new water pump and refill the engine with fluid.
Here are some steps that you might not know:
- You should FLUSH THE ENGINE thoroughly – draining the coolant is not sufficient enough. Flushing the engine will remove any sediment or rust build-up inside the engine and will help prolong the life of the new water pump.
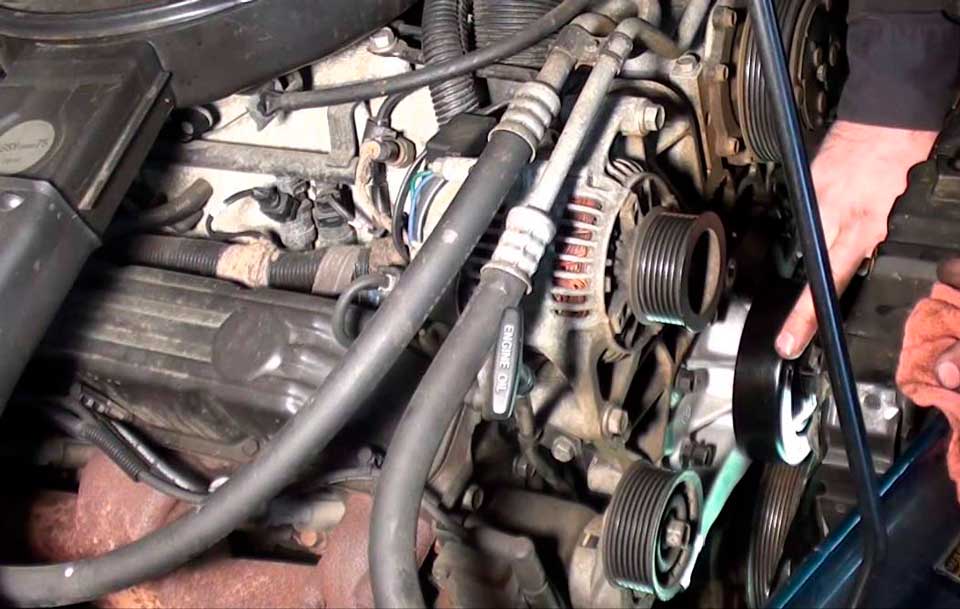
- BE AWARE OF ALL TUBES & ATTACHMENTS – the process is not just as simple as removing the old water pump and installing a new one. Many times, there will be several items that may need to be removed just to gain access to the water pump itself.
- DO NOT USE WATER BY ITSELF – Gone is the day when you could put just water into the radiator and be on your way. Coolant only or a proper mixture of coolant and distilled water should be used after the new water pump has been installed.
- YOU ARE NOT DONE – Ok, the new water pump is installed, all attachments in place and coolant has been replaced – this does not mean you are completed and ready for the road.
Turn the engine on and let it idle until it reaches normal operating temperature. Do not be alarmed if you see a small amount of coolant coming from the weep hole – it does not necessarily mean the water pump is bad – this small leak should disappear once the seal has had a chance to settle. - FINAL CHECK – Once the engine test run is completed, let the engine cool down and top off the coolant in the radiator and recovery bottle.
Do not attempt to remove the radiator cap while the engine is hot.
Now you should be ready to replace and install your new water pump.
Are you looking to buy an aftermarket water pump? We can help you!

Click in the picture to enter in our shop!

The diesel engine timeline is a long history.
Most automobiles out on the road today run on unleaded gasoline.
But most of the trucks that are responsible for moving freight/products from point A to point B are assembled with diesel engines at the heart of the vehicle.
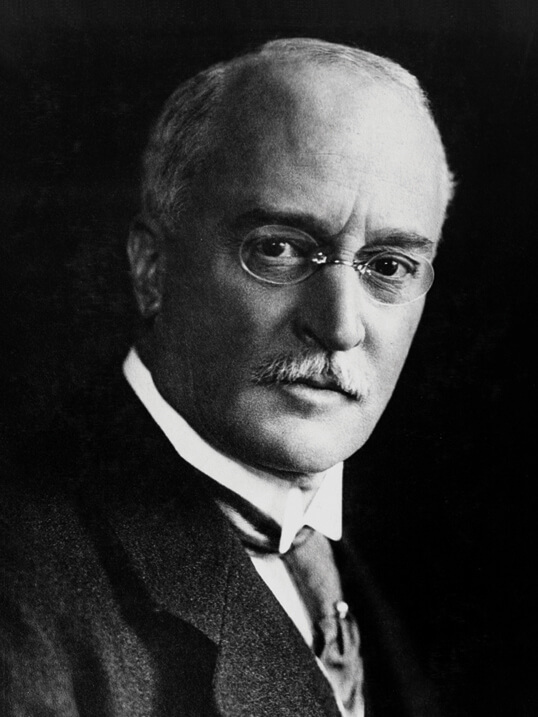
If you want to know the diesel engine timeline you have to know the creator of these engines first.
His name was Rudolf Diesel.
Who invented the first diesel engine?

Rudolf Diesel was born in Paris, a city where his family had emigrated from Germany.
He studied in England and subsequently graduated as an engineer at the Polytechnic of Munich,
where he was a disciple of the inventor of the refrigerator, Carl von Linde, for whose company he later worked as an employee.
From 1893 to 1897 he worked for the German group Krupp, specifically in the prestigious company
MAN AG which at that time was already engaged in manufacturing engines.
Rudolf Diesel considered himself a social theorist.
He wrote a work that gathered his vision of the company, Solidarismus. However, his contribution to this field had little impact.
The night of September 29 to 30, while he was aboard a ship from Antwerp to England, disappeared.
Nobody knows with certainty what happened:
only that, a few days later, the coast guard found his body lifeless.
There has been much speculation about the possible cause of his death:
suicide, since according to some sources he was bankrupt;
an accident on the deck due to dizziness caused by frequent headaches,
and even murder for economic interests, since its engine, not requiring the burning of coal, severely affected the industrialists of this sector.
When was the first diesel engine invented
Diesel-2 In his spare time Diesel worked on the development of an engine that was more efficient than those that existed at the time,
which required externally applying the ignition to the internal mixture of air and fuel.
Diesel got the ignition to occur internally:
compressing the air inside the cylinder and heating it in such a way that the fuel,
which comes into contact with the air just before the end of the compression period, ignites itself.
In 1892 he finished his design and a year later he received the patent of the engine that bears his name.
Their contribution was enormous advantages: smaller and lighter engines than those existing to date,
regardless of the fact that they did not require the use of an additional source of fuel for ignition.
Also, its engine ran with a theoretical efficiency of 75% compared to 10% achieved by traditional steam engines, which reduced costs.
Diesel quickly made a lot of money with its patent:
The industry immediately used its engine to power cars, trucks, and ships, electrical pipes, electric power plants, etc.
Current diesel engines continue to be based primarily on their original invention.
Here are some notable moments of the Diesel Engine timeline:
- October 29th, 1897 Rudolf obtains a patent on supercharging the Diesel engine”
- 1899 First two-stroke Diesel engine was built by Hugo Guldner
- 1903 Two first ‘Diesel-powered’ ships are launched.
- 1909 Prosper L’Orange applies for a patent on ‘precombustion chamber injection’
- 1912 The first locomotive with a Diesel engine is used in Switzerland.
- 1913 Commercial ships and US Navy Submarines began to use the diesel engines.
- 1929 First passenger car with a Diesel engine appears on the road.
- 1938 General Motors forms the ‘GM Diesel Division’ which later becomes Detroit Diesel.
- 1946 Clessie Cummins obtains a patent for ‘fuel feeding and injection apparatus for oil-burning engines’ that incorporated a separated pressure generation apparatus and injection timing device.
- 1962-65 Jacobs Manufacturing Company developed/manufactured a “Diesel compression braking system”.
- 1976 Development of the ‘common rail injection’ begins in Zurich.
- 1979 Daimler-Benz produces the first passenger cars with a ‘turbocharged Diesel engine’.
Today, more than 95% of all large heavy-duty trucks use a diesel engine, as is a majority of medium-duty trucks.
Diesel engines are also used in many different areas
– stand-alone generators, marine applications, locomotive industry and construction industry to name a few.
If you are looking for a reliable diesel engine parts supplier, you can contact us or visit our parts page and look for what you need.
Also, if you have the part number, you can do a part search on the “Seach Parts Button” on the top of the website.