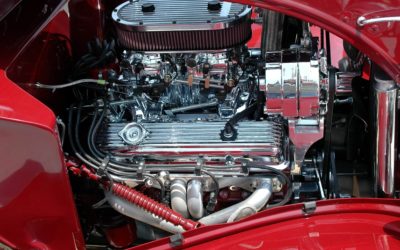
Water Pumps are one of many engine parts that will need to be replaced several times over the course of a vehicle’s life. Most water pumps will last an average of 60,000 to 90,000 miles, some lasting as long as 100,000 miles or more. This is dependent on engine maintenance and how hard the engine is pushed. It doesn’t matter if the vehicle is a small compact automobile or a heavy-duty semi-truck.
Let’s say it is now time for you to replace your water pump and you want to do it yourself. How much do you know about installing a new water pump?
Here are some basics that most people would know:
- Let the engine cool down before you get started.
- Drain all coolant from the engine.
- Remove the old water pump and clean the gasket surface of the old material or sealant.
- Install a new water pump and refill the engine with fluid.
Here are some steps that you might not know:
- You should FLUSH THE ENGINE thoroughly – draining the coolant is not sufficient enough. Flushing the engine will remove any sediment or rust build-up inside the engine and will help prolong the life of the new water pump.
- BE AWARE OF ALL TUBES & ATTACHMENTS – the process is not just as simple as removing the old water pump and installing a new one. Many times, there will be several items that may need to be removed just to gain access to the water pump itself.
- DO NOT USE WATER BY ITSELF – Gone is the day when you could put just water into the radiator and be on your way. Coolant only or a proper mixture of coolant and distilled water should be used after the new water pump has been installed.
- YOU ARE NOT DONE – Ok, the new water pump is installed, all attachments in place and coolant has been replaced – this does not mean you are completed and ready for the road.
Turn the engine on and let it idle until it reaches normal operating temperature. Do not be alarmed if you see a small amount of coolant coming from the weep hole – it does not necessarily mean the water pump is bad – this small leak should disappear once the seal has had a chance to settle. - FINAL CHECK – Once the engine test run is completed, let the engine cool down and top off the coolant in the radiator and recovery bottle.
Do not attempt to remove the radiator cap while the engine is hot.
Now you should be ready to replace and install your new water pump.
Are you looking to buy an aftermarket water pump? We can help you!

Click in the picture to enter in our shop!

The diesel engine timeline is a long history.
Most automobiles out on the road today run on unleaded gasoline.
But most of the trucks that are responsible for moving freight/products from point A to point B are assembled with diesel engines at the heart of the vehicle.
If you want to know the diesel engine timeline you have to know the creator of these engines first.
His name was Rudolf Diesel.
Who invented the first diesel engine?

Rudolf Diesel was born in Paris, a city where his family had emigrated from Germany.
He studied in England and subsequently graduated as an engineer at the Polytechnic of Munich,
where he was a disciple of the inventor of the refrigerator, Carl von Linde, for whose company he later worked as an employee.
From 1893 to 1897 he worked for the German group Krupp, specifically in the prestigious company
MAN AG which at that time was already engaged in manufacturing engines.
Rudolf Diesel considered himself a social theorist.
He wrote a work that gathered his vision of the company, Solidarismus. However, his contribution to this field had little impact.
The night of September 29 to 30, while he was aboard a ship from Antwerp to England, disappeared.
Nobody knows with certainty what happened:
only that, a few days later, the coast guard found his body lifeless.
There has been much speculation about the possible cause of his death:
suicide, since according to some sources he was bankrupt;
an accident on the deck due to dizziness caused by frequent headaches,
and even murder for economic interests, since its engine, not requiring the burning of coal, severely affected the industrialists of this sector.
When was the first diesel engine invented
Diesel-2 In his spare time Diesel worked on the development of an engine that was more efficient than those that existed at the time,
which required externally applying the ignition to the internal mixture of air and fuel.
Diesel got the ignition to occur internally:
compressing the air inside the cylinder and heating it in such a way that the fuel,
which comes into contact with the air just before the end of the compression period, ignites itself.
In 1892 he finished his design and a year later he received the patent of the engine that bears his name.
Their contribution was enormous advantages: smaller and lighter engines than those existing to date,
regardless of the fact that they did not require the use of an additional source of fuel for ignition.
Also, its engine ran with a theoretical efficiency of 75% compared to 10% achieved by traditional steam engines, which reduced costs.
Diesel quickly made a lot of money with its patent:
The industry immediately used its engine to power cars, trucks, and ships, electrical pipes, electric power plants, etc.
Current diesel engines continue to be based primarily on their original invention.
Here are some notable moments of the Diesel Engine timeline:
- October 29th, 1897 Rudolf obtains a patent on supercharging the Diesel engine”
- 1899 First two-stroke Diesel engine was built by Hugo Guldner
- 1903 Two first ‘Diesel-powered’ ships are launched.
- 1909 Prosper L’Orange applies for a patent on ‘precombustion chamber injection’
- 1912 The first locomotive with a Diesel engine is used in Switzerland.
- 1913 Commercial ships and US Navy Submarines began to use the diesel engines.
- 1929 First passenger car with a Diesel engine appears on the road.
- 1938 General Motors forms the ‘GM Diesel Division’ which later becomes Detroit Diesel.
- 1946 Clessie Cummins obtains a patent for ‘fuel feeding and injection apparatus for oil-burning engines’ that incorporated a separated pressure generation apparatus and injection timing device.
- 1962-65 Jacobs Manufacturing Company developed/manufactured a “Diesel compression braking system”.
- 1976 Development of the ‘common rail injection’ begins in Zurich.
- 1979 Daimler-Benz produces the first passenger cars with a ‘turbocharged Diesel engine’.
Today, more than 95% of all large heavy-duty trucks use a diesel engine, as is a majority of medium-duty trucks.
Diesel engines are also used in many different areas
– stand-alone generators, marine applications, locomotive industry and construction industry to name a few.
If you are looking for a reliable diesel engine parts supplier, you can contact us or visit our parts page and look for what you need.
Also, if you have the part number, you can do a part search on the “Seach Parts Button” on the top of the website.

The heavy duty aftermarket has seen many changes over the last 30 plus years. These changes have affected not only the sales of heavy duty truck parts, but the overall quality of the parts as well.
Commercial Trucks–1982:
- There were an estimated 3.6 million commercial trucks on the road.
- Two-Thirds of them were medium duty classification.
- Of the heavy duty trucks on the road, 50% of them were Class 6.
- Class 8 trucks only ran an average of 50,000 miles per year.
Commercial Trucks–2012:
- There is an estimated 4.4 million commercial trucks on the road.
- Class 8 trucks make up 65% of this number.
- Class 8 trucks run an average of 76,500 miles per year.
One would think, with significantly more heavy duty trucks on the road, replacement parts would be in high demand. As technology has improved, the quality of parts has improved.
Expected Parts Mileage:
- In 1982 an alternator would last an average of 132,000 miles, clutches an average of 171,000 miles and a Class 8 engine would be overhauled at around 276,000 miles.
- Today, an alternator would last an average of 278,000 miles, clutches an average of 369,000 miles and a Class 8 engines would be overhauled at 680,000 miles.
- Technology has increased the life of heavy duty truck parts, so they do not need to be replaced as often. Most truck owners today may never replace a clutch or overhaul an engine.
Federal emissions regulations have also impacted the Aftermarket industry. Over the last 5 years, new regulations are being enforced on trucks to have cleaner emissions. More often than not, it’s more prudent to buy a new truck that already meets these standards, then try to convert the older truck.
It has been noted that there is a “sweet spot” for the aftermarket when a Class 8 truck is 7-8 years old. This is when major components of the truck may need to be replaced, or an overhaul of the engine may need to be done. Any extended warranties would be ended by this time, and truckers/fleets would be looking at aftermarket sources to fill their heavy duty truck parts needs. Besides overhauling the engine and replacing parts, the only other options would be to purchase a new truck or glider kit-built truck.
Heavy Duty Aftermarket (Class 6-8)-1982:
- $9.3 billion dollar business
- The percentage of heavy duty truck parts being sold in the aftermarket – power generation-40%, power transmissions-23%, undercarriage business-18%, electrical-11% and other parts-8%
Heavy Duty Aftermarket (Class 6-8)-2013:
- $22 billion dollar business
- The percentages of heavy duty truck parts being sold in the aftermarket – power generation-34%, undercarriage-21%, power transmissions-14%, cab/chassis-13%, electrical-8% and other parts-10%.
The aftermarket industry is crucial to keeping transportation & shipping industries on the road today and for many years to come.

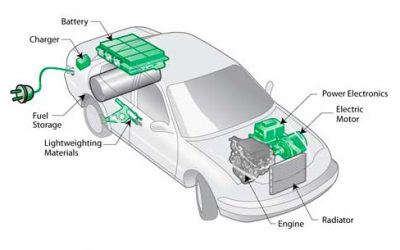
Recently I had been researching hybrid vehicles and technology to learn about them and maybe in future purchase a hybrid vehicle. While web surfing hybrids, I came across an article on the www.theguardian.com website that caught my attention. The title was “Can flywheel technology drive out the battery from car hybrids?” The article discusses the potential of a flywheel-based Kinetic Energy Recovery System (Kers) that could potentially replace the battery in hybrids. These vehicles are known as “Flybrids”
Before discussing these ‘flybrids’, here is some information on hybrids that I found to be interesting:
- Hybrid technology was first used in 1900 and in 1901, Ferdinand Porsche developed the Lohner-Porsche Mixte Hybrid, the first gasoline-electric hybrid automobile in the world. An interesting notation that I had found on Wikipedia.
- The Toyota Prius was the first mass produced hybrid vehicle and helped create the current hybrid craze that is going on today.
- 7.5 million hybrid vehicles have been sold through December of 2013 since they became massed produced in 1997, 6 million of these are Toyota Motor Company owned between Toyota & Lexus brand names.
- In 2009, the U.S. House of Representatives approved the ‘Heavy Duty Hybrid Vehicle Research, Development & Demonstration Act of 2009’ for heavy duty plug-in hybrid vehicles.
- According to Pike Research, the estimated global market of hybrid medium/heavy duty trucks & buses on the road was 9,000 vehicles in 2010 and expected 100,000 vehicles in 2015. Coca-Cola Enterprises has the largest fleet of hybrid trucks in North America.
Hybrid heavy duty trucks can haul some weight as well. Freightliner Hybrid technology was boasting their new line of trucks having a Gross Vehicle Weight Rating up to 55,000 lbs, a range of 200-320 hp, with torque output ranging from 520-750 lb/ft. These trucks can move/haul just about anything standard diesel engine trucks can as well. If you are in market for a new truck, you should give a hybrid truck a second look.
Now I want to reflect on the ‘flybrid’ article a little bit more. Flybrids are not only for automotive vehicles. There are buses in London currently operating with flybrid engines as a test run, with some also expected in Northern Ireland also.
The concept of the flybrid is, the kinetic energy recovered during braking would spin a flywheel. The recovered energy is stored in the spinning flywheel, to be released upon acceleration. The amount of energy a flywheel can store depends on its mass and the speed at which it is rotating. Certain prototypes have provided up to 80 bhp boost.
Flywheels are lighter than batteries and are easier to dispose of when they go bad. A flybrid engine offers a prospect of improved fuel efficiency as well. Unlike batteries, you can charge a flywheel up & slow it down multiple times without the degradation of performance.
Car manufacturers such as Porsche, Jaguar, Audi & Volvo have begun to experiment with flybrid technology in recent years. Audi Sport’s flywheel hybrid, the R18 E-Tron Quattro, became the first hybrid vehicle to win the legendary “Le Mans 24 hour endurance race.”
As intriguing as this flybrid and Kers technology is, I would not expect a big exploding trend just yet for flybrids on the market just yet. Toyota themselves haven’t shown interest in flybrids, and the major companies who have do not feel the technology is ready for mass production at this time.
In another 5 years or so, you could be debating, Hybrid or Flybrid, when it comes to your next vehicle purchase.

Marine exhaust systems are an important part of marine engines, but are often overlooked. When it comes to the exhaust systems, there are two main options for recreational boats: Wet or Dry.
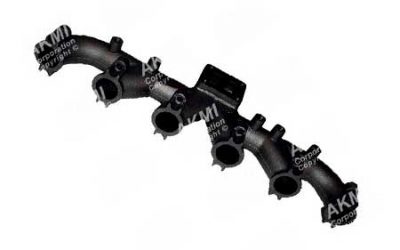
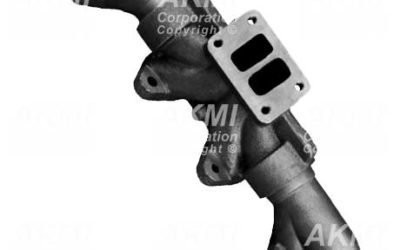
Ever wonder why a marine exhaust manifold looks like a big square piece of metal versus an automotive exhaust manifold with its tubes more prominent. The main reason is to accommodate the flow of water mixing in with the exhaust fumes, this type of manifold would apply to a “Wet” exhaust system.
All Wet
A wet exhaust mixes seawater with the exhaust before it can be routed out of the boat. Injecting seawater into the exhaust can dramatically lower the temperature of exhaust run, which reduces risks of fire or being burned by an exhaust pipe.
The water is provided by a dedicated seawater pump which in turn routes water through the engine lube oil cooler, gearbox cooler and main heat exchanger prior to being injected into the exhaust downstream of the exhaust manifold itself.
Bone Dry
This is a dry exhaust system (no seawater is present) and produces high temperatures. Diesel exhaust gases can reach as high as 1200 degrees F. This means that special “lagging” or insulation needs to be added to surrounding areas or parts, to protect surrounding equipment, boat structure and people.
Since no water is used in the exhaust, there are different options in regards to engine cooling. A heat exchanger can be used and seawater would simply be discharged overboard. Another common alternative would be moving the entire heat exchanger outside of the boat. The passing water would carry away the heat, much like a radiator does for a car.
While wet exhaust systems are much more common for recreational boats in general, many builders of deep-sea passage makers prefer to use dry exhaust systems on a number of their models.
Wet Exhaust – Pros & Cons:
- PRO – Far fewer heat issues with exhaust runs.
- CON – Seawater pump failure could destroy the engine.
- PRO – More Interior Space
- CON – Extra maintenance for the sea strainer, pump and injector elbow
- PRO – Easier to design and install
- CON – Exhaust can blow into boat in following wind.
Wet exhaust systems also require a hole in the boat for the intake which requires extra sealing. If the pump fails or strainer is clogged, engine temperature would begin to rise and set off alarms. You may only have a few seconds to shut down your engine before major damage is done.
There is also the potential of flooding the engine when over cranking at engine start-up. Too many unsuccessful starting attempts could dump enough water into the exhaust flooding the turbocharger, exhaust manifold, cylinders and cause catastrophic damage to an engine.
Dry Exhaust – Pros & Cons:
- PRO – No seawater pump to maintain, or have fail
- CON – Dangerous heat levels
- PRO – No seawater strainer to maintain, or have clog
- CON – Space accommodations for stack (less interior space)
- PRO – Exhaust released well above deck
- CON – Complex Design and construction
With dry exhaust systems, most frustrations come from the design of the exhaust rather than the performance or maintenance. There are less parts to worry about, which means not as much maintenance needed. The biggest challenge is insulating/shielding parts so the heat is not damaging other parts, boat structure, or burning the people who have to service the engine.
While wet exhaust systems appear to be more common, especially with recreational boats, they also require more maintenance and replacement parts.
If you can take the heat and like better reliability, then a dry exhaust system may be the best option.
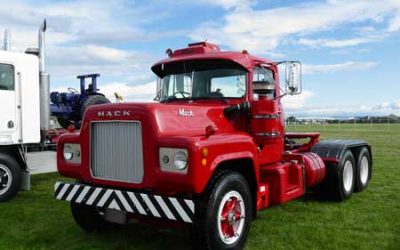
Have you ever heard the phrase ‘Built like a Mack Truck’ and ever wondered where it came from. Maybe you are a truck mechanic who is replacing heavy-duty truck parts on a Mack truck and you thought about where the saying came from. Or you could be a commuter who noticed a Mack truck on the road and was curious about its history. At some point in time, I think everyone has heard the saying and probably was curious where it came from.
Mack Trucks have been an American staple since the 1900s and is one of the first big-name truck manufacturers to have sustained success for more than a century. Kenworth began a business in 1912, Freightliner was developed in t
he 1930’s and Peterbilt was established in 1939.

Who made mack trucks?
If you want to know the history of mack trucks, you have to start with the creator.
John M. Mack, known as “Jack” and his brother Augustus purchased the wagon company that John worked for in 1893.
The following year, their brother William joined operations. The brothers began experimenting with steam-powered and electric motors.
Inspired by the Wright Brothers-Orville & Wilbur, Willis Carrier, and Henry Ford’s inventions, John Mack had a vision about producing heavy-duty trucks, engines, and replacement parts.

Company
The “Mack Brothers Company” was founded in 1900 and the company opened its first bus manufacturing plant the same year. A sightseeing company had placed the first order.
Mack’s first truck was manufactured in 1907.
During World War I, Mack delivered over 6,000 trucks to the American and British military for use during the war. Rumor has it that the British soldiers were so impressed with the Mack Trucks durability, toughness and reliability they gave them the nickname of “Mack Bulldogs” after their own British Bulldogs.
Mack truck logo history
The history of mack trucks logo?.
In 1922, “Mack Brothers Company” changed its name to Mack Trucks and the bulldog was accepted as the company’s corporate Logo.
The bulldog was first portrayed on a steel plate mounted to the side of the truck, the hood ornament appeared approximately 10 years later. These trucks with a gold plated bulldog indicate that the truck is made entirely of Mack parts, while built with another manufacturers’ transmission, engine, rear axles or suspension are given the chrome-plated logo.
Manufacturing
Mack Trucks made a name for themselves by being tough and reliable trucks.
But they offered many advancements to heavy-duty truck engines and their parts as well.
In 1918 they became the first manufacturer to apply air cleaners and oil filters to their trucks.
In 1920 became the first truck with power brakes.
Also became the first manufacturer to produce their own diesel engines in 1938.
Engines history
Jumping ahead to the 1960s, vice president of product and engineering, Walter May, had developed the Maxidyne high torque rise engine, first as an inline V6 and later a V8. The development was an industry-changing event, as it allowed a Class 8 heavy-duty engine to operate with a 5-speed transmission. Previously trucks would have 10 gears’ or more.
Mack Trucks is a top producer in the vocational “on-road-vehicle” Class 8 through Class 13.
They are also among the most popular manufacturer of heavy-duty “off-road” trucks in America. Are also sold worldwide in 45 different countries.
Their main assembly plant is located in the state of Pennsylvania and has the capability of manufacturing all known heavy-duty Mack Truck Parts.
For more than a century, Have been prominent on American roads.
Their durability to withstand world wars, rising competition, and the test of time is a testament to the brothers that first had a dream and made it come true.
Do you know of anything that is ‘Built like a Mack Truck?’

This car is a legend. That’s all we have to know. We don’t need numbers and figures to prove the charisma of an icon, we just know. However, the Volkswagen Beetle has so much to say, and they’re not just boring facts, but a cool story to how it became our favorite bug. Maybe that’s why we came to love bug beetle in the first place. So why don’t we refresh our memories and take a road trip back to where it all happened, then arrive at why we think it is legendary. Seatbelts?
I told you this would be interesting. Even Hitler was a fan! This was in 1938, three years after Dr. Ferdinand Porsche, the man beside Hitler and the mastermind of Beetle’s unique design, created the Volkswagen which means “people’s car” in German. He later created his line of cars and named it after him. Ring a bell?
How born the VW beetle idea and the love of bug beetle
If you are curious and you love the beetle you have to know a little bit of its story first.
In 1931, Ferdinand Porsche and Zündapp developed the Porsche Type 12 the first Volkswagen, the “Auto fur Jedermann” which means “the car for everyone“. Porsche had already developed a four-cylinder boxer air-cooled engine and Zündapp was developing a water-cooled 5-cylinder radial engine. Porsche had chosen a torsion bar rear suspension by Edward Rumpler.
In 1932, there were already three prototypes, and later a fourth in 1933, the Porsche Type 32, built by the NSU motorcycle factory.
Adolf Hitler loved bug beetle since its born.
In 1933, Adolf Hitler commissioned Porsche to design a car for the people (literally in German, Volks Wagen). The car should have a capacity for two adults and two children, with room for suitcases and be able to reach 100km/h. The German National Socialist Party had already used the term “Volks” for other party-sponsored products, such as the Volksradio.

However, the name Volkswagen would not be the official one until a few years later. This new vehicle was initially named Porsche Type 60 and then baptized as KdF-Wagen. KdF was the initials of Kraft Durch Freude (Strength through Joy), the leisure section of the Third Reich.
The first prototype released was in October 1935, the Type 60, known as the V1. In 1936 tests began with the three V3 prototypes manufactured at Porsche’s Stuttgart facility. In 1937, the 30 W30 models, manufactured by Daimler-Benz, already accumulated 2,900,000 km of tests. All vehicles already had the distinctive rounded shape and air-cooled engine at the rear.
Hitler’s plans and his love for the bug beetle were to make this new vehicle available to everyone and for that, he introduced a form of fractional payment. Consumers would buy a “Sparkarte” (a coupon booklet) for 1 Reichsmark, equivalent to about 25 euro cents. After buying the coupon book, you had to buy at least 5 Reichsmarks in coupons a week. The total price that for the basic vehicle was 990 Reichsmark.
In 1938, the Stadt des KdF-Wagens was built around the village of Hesslingen which was where the workers of the KdF-Wagen factory lived.
When World War II broke out in 1939, only a few units had been for consumers.
The war and the beetles
The two main vehicles produced during the war were variants of the Beetle, as the four-cylinder boxer air-cooled engine and rear torsion bar suspension was ideal for the harsh desert conditions in Africa.
Firstly was the Type 82 Kubelwagen, a very basic all-terrain utility vehicle. German military officers had stipulated that the total weight of the fully-loaded Kubelwagen (including 4 soldiers armed for battle) should not exceed 950 kg, leaving the maximum weight of the unladen vehicle at 550 kg. Porsche subcontracted Trutz, an experienced manufacturer of military vehicles, to collaborate on the body design.
The first successful tests were out in 1938 and continued in Poland in 1939. The result of these tests prompted the German military to ask for some important changes. Although the vehicle had shown impressive results on all terrains, even compared to some 4x4s that already existed at the time, the military thought it could be improved, and that the minimum speed of the vehicle had to be reduced from 8km/h to 4km/h in order to match the troops’ walking speed.
Porsche gearboxes
Porsche responded to these requests by installing “gearboxes” (what in practice was a second gearbox with a higher torque), larger wheels and a revised suspension. The gearboxes together with ZF’s self-locking differentials increased the vehicle’s all-terrain capability and made it possible to reduce the minimum speed to match the pace of the troops. Kubelwagens began mass production as soon as the factories at Stadt des KdF-Wagens were finishing.
The second vehicle produced during this period was the Type 166 Schwimmwagen, based on the Kubelwagen 4×4 prototype. The Schwimmwagen was an amphibious all-terrain vehicle using an extended crankshaft that operated a folding propeller at the rear of the vehicle.
This propeller coupling was so simple that the Schwimmwagen could only use the propeller to move forward. To reverse it was necessary to paddle or use the ground wheels to reverse slowly.
The Beetle Turbo

Volkswagen Beetle Turbo
Presenting the Beetle Turbo another reason for our love for bug cars. Convertible sculpted from powerful cosmetic enhancements. It’s an extensive package composed of performance-inspired perks and detailed sleek. You can still sniff the original one’s charm, but this one’s created to suit our contemporary needs. What a beauty!
Re-designing the Beetle is like a noob going head to head with the Godfather. The chances are slim. But why do people still applaud the Beetle despite its evolution throughout the century? May it be the name, the design, the movie, or its story, the Love Bug lives on! It’s legendary, and that’s all we need to know.

Let’s say you are a new start-up company and you have a fleet of heavy duty trucks. You have some experience in the trucking industry, but feel it would be too costly to keep in-house mechanics and maintain your fleet.
Finding trained & skilled mechanics is not cheap, but the risk of hiring one trained person and hoping he can train unskilled labor is one you don’t want to take.
Then maintaining your inventory of commercial truck parts for your fleet can be challenging and ending up with too much of one item and not enough of another can lead to longer downtimes for your vehicles.
So after looking at the cost and risks of an “in-house” maintenance program, you decide that you would rather outsource the repair work. How do you know which shop will be the best for your fleet needs?
Working for a company that sells commercial truck replacement parts on a wholesale level, I had never thought about it before.
Being a wholesaler, our company doesn’t deal with the general public. We have referred callers to our closest customer in their area before, but had never given a thought about repair shops in general.
Not until a caller asked me if any of his choices were a repair shop as well, so I decided to do some research.
Now since I still do not have a need for a repair shop, I researched on how to go about finding the right repair shop for your needs.
Here is a list of some ideas to consider when looking for a repair shop:
- Make an initial list of the repair shops in your area and begin by looking at the website, if offered.
- A professional or user friendly website can be a sign the company conducts itself professionally.
- Call up the companies on your list and evaluate their customer service. Are they willing to take the time to speak with you on the phone or are they rushed and trying to end the call quickly? Depending on how these calls go, you could eliminate some companies from your list.
- Review the list of services provided. Some repair shops may only specialize in one area of repair work, meaning you would have to find another shop for other repairs.
- Make sure the repair shop does work on your vehicle brand/application. If you have a truck with a Aftermarket Detroit S60 engine and take it to a shop who specialize in Caterpillar, you may not get the best repair work done.
- What is the labor rate of the shop and hours of operation?
- Ask about their technician certifications and experience.
- What is the vehicle turnaround time for repairs and their service backlog look like? A shop could do quality repair work, but if understaffed, they could take longer to get your truck up & running.
- Does the repair shop maintain an internal inventory of commercial truck parts, or would parts have to be ordered and shipped to them? You may have to wait a day or longer to get your truck back on the road.
- Make sure the repair shop has good insurance coverage. Last thing you would need is for some sort of accident to happen, or the building burns down, and the repair shop insurance won’t cover your truck.
- Will the shop offer a warranty on their labor?
All of the things listed above are great, but feeling comfortable with the company is just as important. Another thing to consider, just because a company is the cheapest option, doesn’t necessarily mean they are the worst option. The same thing can be said about speed as well.
Granted, you want your truck on the road as soon as you can get it there, but you want it to last for a long time as well. Quality repair work can help make that happen.
If you are running vehicles multiple hours a day or in some form of a professional racing league, having your parts professionally coated is probably your best option. But what about the average guy who is looking to restore their dream car, but is on a budget. Do-it-Yourself options can help save some money.
Deciding what brand name or type of coating would be the most difficult choice.
They have cans that look like traditional paint and used in paint sprayers, or Aerosol can options. The Aerosol can option may not always be ceramic coatings, they may just be high-temp resistant paint. If you have an air compressor and access to a paint spray gun that would be best. Even a cheap spray gun from a local supply store would work.
Steps to ceramic coating of your engine parts
Let’s say you want to put a ceramic coating on your exhaust manifold, here is what I have found to be the basic steps:
- Make sure you clean the entire exhaust manifold inside as well as the outside. Professionals will have fancy chemicals to help assist them, but a strong household degreaser can work just as well.
- Then you would want to sandblast the manifold to remove any loose pieces or dirt the degreaser couldn’t remove. If you do not have a sandblasting tool or access to one, then you can use steel wool or sandpaper. It may take longer to do, but prepping the surface is a must.
- Prepare your work area. Lay down tarps and cover anything (in immediate area) that you do not want to be painted. If possible, hang the part(s) by a wire, so the manifold or its pieces are suspended in the air. This would be an ideal position for painting, but not necessary.
- Put on a safety mask or respirator, gloves, safety glasses and make sure you have plenty of ventilation if working in a garage or home workshop area.
- Before you begin to spray, make sure you read the instructions on the label of the product you purchased.
- Spray an even coating over the entire piece(s). Allow a few minutes to dry before applying multiple coats.

Curing process
After applying the final layer to your exhaust manifold, the curing process is next. Professionals have industrial ovens and other heating equipment that can begin the curing process no problem. Using a conventional oven that can reach a temperature of 500 degrees can work, but you wouldn’t want to use the oven from your kitchen. Without access to an oven or a heat gun, you would need to let the manifold dry for at least eight hours.
The final stages of the curing process occur while the parts are installed on the engine. You want to start the vehicle and let the engine run on idle for at least an hour, or drive the vehicle around. Then let your engine cool down completely and repeat the cycle. This may need to be done a few times, refer to the product instructions.
High temperatures
One important thing to note is that excessive heat from a poorly tuned engine can actually damage the ceramic coating of your exhaust manifold or other coated parts. Make sure all adjustments to camshafts, springs, valves, timing, and fuel injection system are done, otherwise all the time spent coating your manifold and other parts could be time wasted.
Whether you are looking to restore your dream car, or you would like better performance and protection for your everyday car, the do-it-yourself option for ceramic coating can save you some money that can be used for different areas of your vehicle.
Benefits of ceramic coating your exhaust manifold
- Increase performance reducing the backpressure.
- Surface temperature reduction: Heat at those levels is enough to do serious damage to internal parts of the vehicle.
- Prevent corrosion: Ceramic has high resistance and is very durable.
Exhaust manifold ceramic coating cost
The price really depends on the version of your exhaust manifold, each part needs a process before applying the ceramic coating. So the prices can be around 40$ to 250$ or more. (Remember that there are estimates)
Often referred to as being the same thing, flywheels and flexplates have similarities but are quite different.
1. Flywheels are typically found on vehicles equipped with manual transmissions, while flexplates are used in vehicles with automatic transmissions.
A manual transmission has a flywheel that is attached to the crankshaft and has a clutch disk in between the pressure plate and flywheel.
When someone presses the clutch, the throwout bearing is pushed in, which forces the pressure plate to stop applying pressure to the clutch disk.
As this happens, it stops receiving power from the engine.
So the gear shifts without damaging the transmission.
Once the operator/driver shifts into a new gear release the clutch pedal then the clutch disk is allowed to start receiving power from the engine once again.
Automatic transmissions eliminate the clutch and grinding.
Basically automating the shifting process so the driver does not have to worry about shifting gears while driving.
A flexplate is mounted to the crankshaft and connects the output from the engine to the input of a torque converter.
Torque converters replace the clutch of a manual transmission.
Allowing the load to be separated from the power source.
They are generally a type of fluid coupling that can multiply torque and is used in transferring rotating power from the prime mover (internal combustion engine or electric motor) to a rotating driven load. The torque converter is located between the flexplate and the transmission.
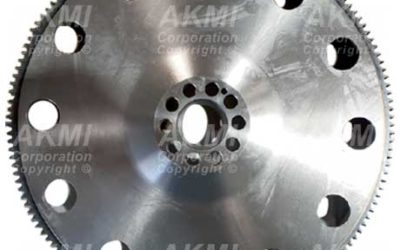
Flywheels, due to the friction process, are very thick, made of steel and are as heavy as they look.
Their lifecycle can outlast that of the clutch but will need resurfacing before installing a new clutch.
When they need do need replacing, you can typically get away with using an aftermarket replacement.
2. Flexplates are much thinner than a Flywheel
As well as the ring gear it uses to connect with the starter (depending on vehicle and engine size), and are much, much lighter.
This is due to the fluid coupling of the torque converter, which eliminates the grinding of a clutch.
The lighter, thinner metal frame has an ability to flex across its main axis – bending side to side (hence the name Flexplate) – taking up motion in the torque converter as the rotational speeds change.
The metal frame of the flexplate itself will have multiple machine-cut holes within the body of the plate.
One set of holes will look uniform and would be for mounting to the crankshaft.
The other holes are specific to the vehicle, torque converter set-up and potential weight balance of the flexplate.
No matter the car size, small economy size or heavy-duty truck.
If your vehicle has a manual transmission and you have to step on the clutch to shift gears, your vehicle has a flywheel as part of your transmission. If all you have to do is put the shifter in a drive (D) and step on the gas pedal, your vehicle has a flexplate.

3. Repair and replacement cost
If you have problems with your flywheel you probably have to replace them, but what it´s their costs?
The replacement of the flywheel can vary depending on the model and the quality, the prices are about 35$ and 400$. In our shop, we have a variety of flywheels for your comfort.
Those were some important facts about flywheels and flexplates.
Now, can I drive with a cracked flexplate?
Sure you can drive with a broken flexplate but is heavily dangerous.
And the sound of the broken part is terrible if you have a broken flexplate or flywheel you have to go to your mechanic immediately and change the part.